

how to install ceiling tiles
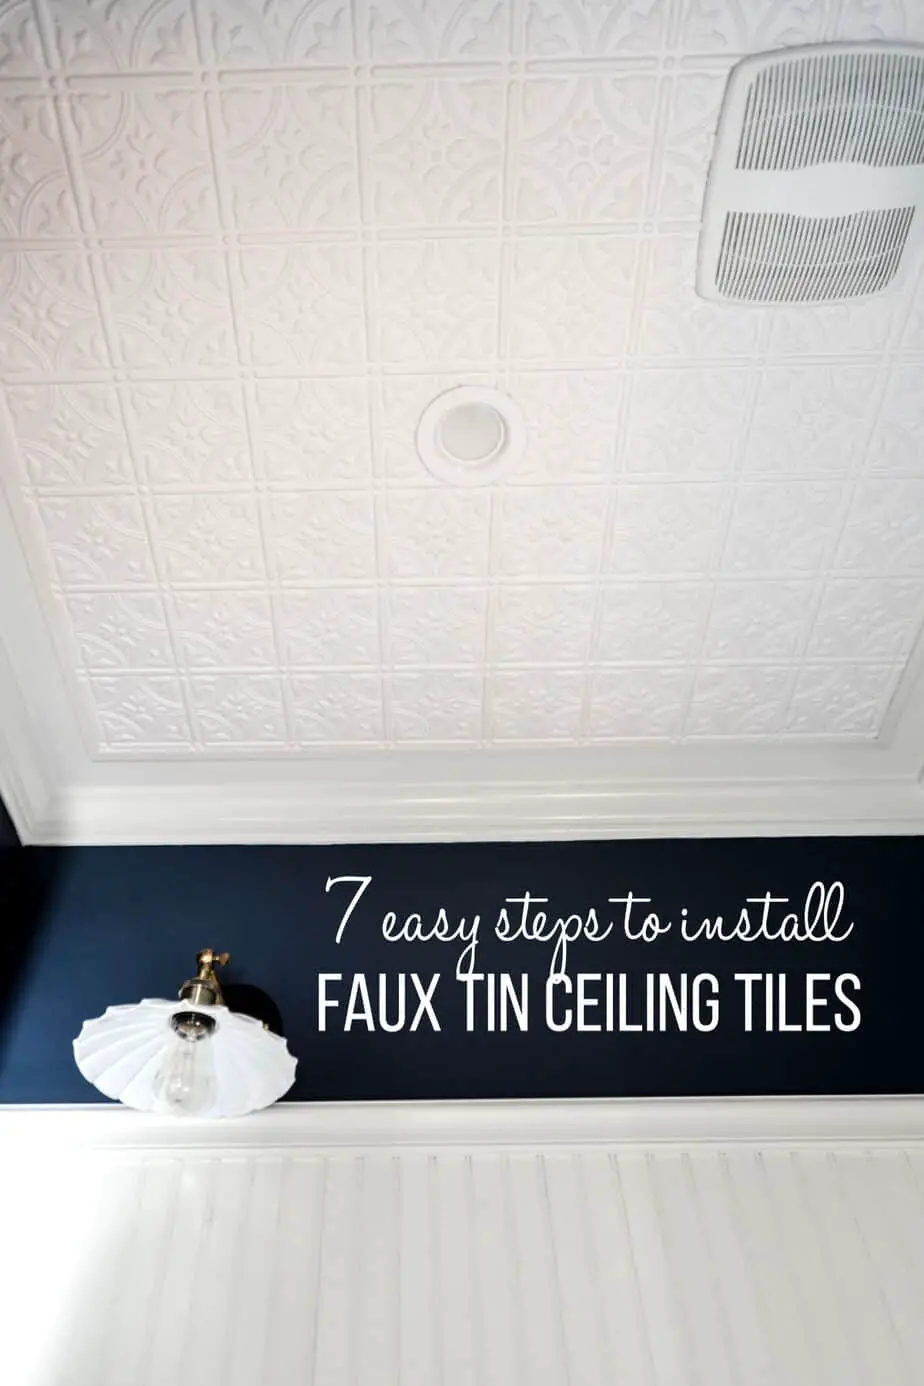
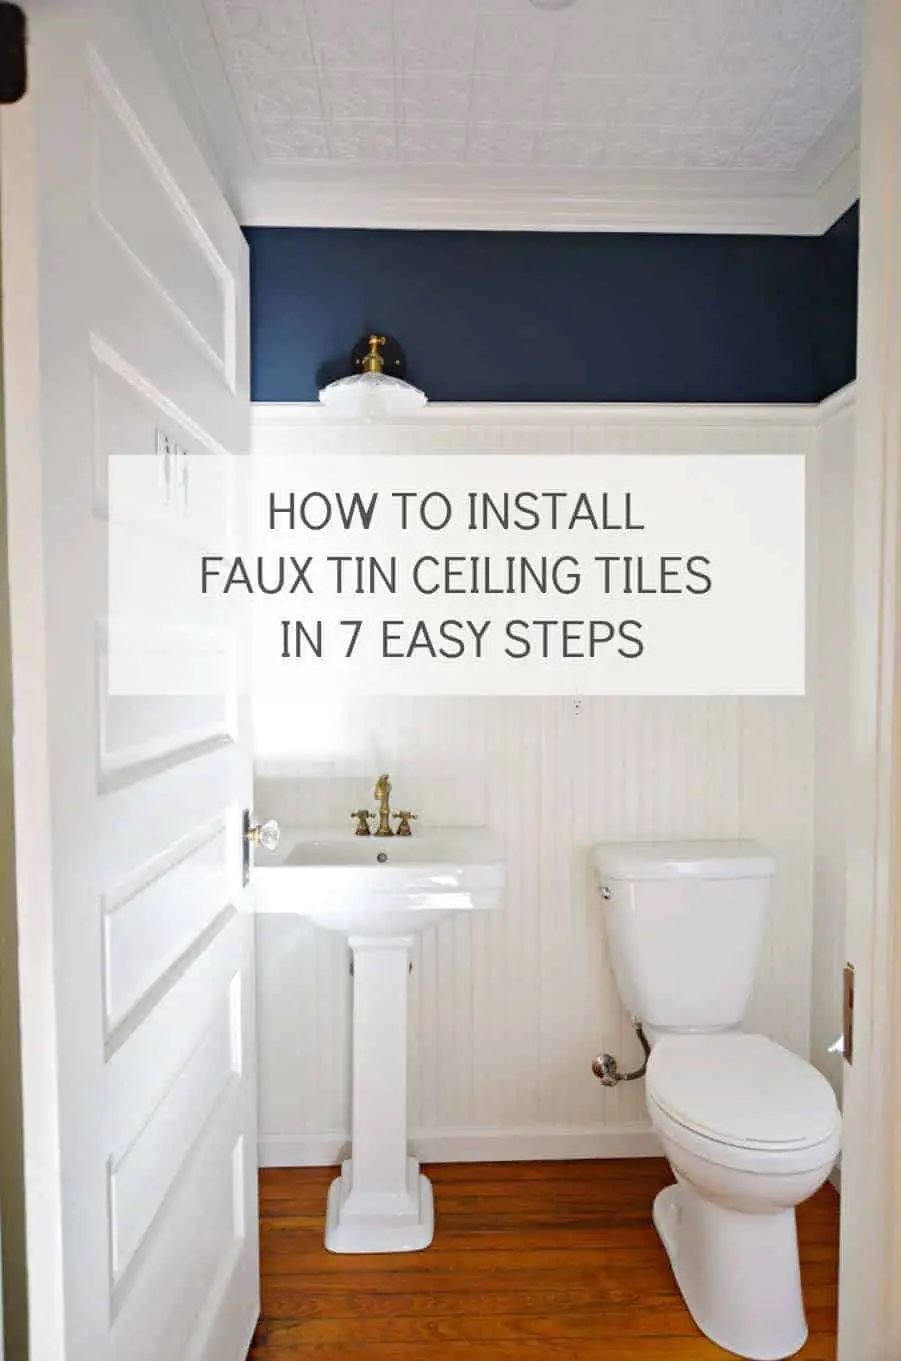
Today, I'm going to show you how to install glue-up faux tin ceiling tiles so you can transform your ceilings from so-so to spectacular. In just a few hours and with about $40 in materials, we added character to our powder room. Even though it was done in a small room, you can certainly incorporate the same easy steps in a much larger room.
Before we even got started, we ran into some concerns such as:
Do we cover the entire ceiling with it?
Do we place the crown molding on top of the tin ceiling tiles or install it flush against the edge of the crown?
Then, how in the world would we caulk where the tiles meet the crown molding without making a mess?
Arghh. Too many decisions!
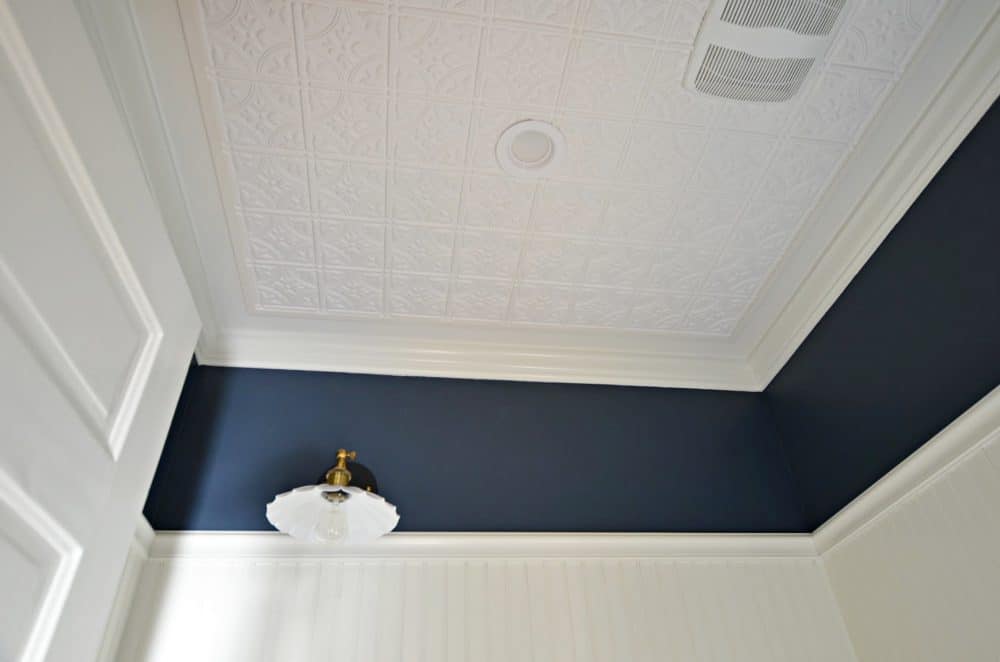
Thankfully, Jason came up with the idea to place the panels in the center of the ceiling leaving a 5″ space away from the edges of the wall. He'd then trim it out with 3/4″ flat strips of wood trim. After a coat of white paint, the thin trim around the ceiling tiles will make the crown molding look taller.
Sounds like a plan!
This is also a technique you can use if you have existing crown molding that you don't want to remove.
*some links may be affiliate links
Where to buy faux tin ceiling panels:
The 2′ x 4′ ceiling panels we used came from Amazon. The exact panels we purchased can be found by clicking this link. For some reason, they no longer offer free shipping.
But I did find another company that sells a very similar pattern and has free shipping in this link.
If we were doing a larger area, we could have saved around 60 cents per square foot by buying the 160 square foot bundle.
Update: After I published this post, a reader shared where you can purchase the same exact ceiling tiles for less than we paid from Home Depot. Plus, you get free shipping to your home if you make a $45 purchase.
I've also been told that Menards carries a similar product if you're lucky enough to have one nearby.

Each "tile" within the panel is about 6″ X 6″.
A few things you should know about this product:
1. The 2′ X 4′ panels are made from thin, flexible and lightweight thermoformed plastic. Since they're flexible, you might want an extra hand to help you put them up.
2. They can easily be cut with scissors or a razor.
3. The white panels are paintable. I'd suggest using a spray primer before painting. It'll also be easier to paint them before installation. Or you can buy the tiles that look like silver, bronze or copper found in this link (or cheaper from Home Depot here). Personally, I love the understated beauty of the white tiles.
4. You can use these to cover popcorn ceilings, but make sure the ceiling is clean and secure first. The glue will create a self-leveling effect but you'll need to use slightly more glue than if gluing to a flat surface.
Tip: To see another way to cover popcorn ceilings that costs even less per square foot can be seen in our post, The Easiest Way to Cover Popcorn Ceilings.
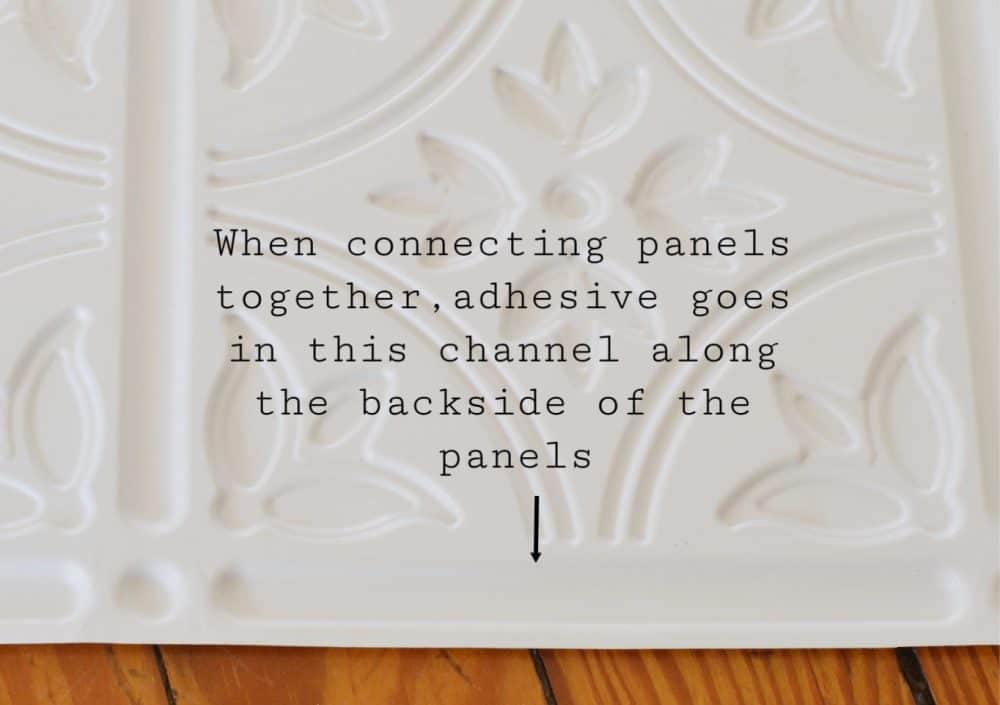
5. The panels fit together like a puzzle with at the "dot and dash" pattern along the sides. Within the "dash" is where you'll apply a very small bead of adhesive when you lock them together.

6. Since the panels overlap when locked together, you lose a half inch. So take that into consideration when planning how many you need.
7. They're great for areas that get a lot of humidity like bathrooms. You don't have to worry about them rusting like real metal tiles.
How to install a faux tin ceiling in 7 easy steps:
- Click here to see the instructions that come with the faux tin ceiling panels from the manufacturer. They also go over how to apply the tiles if you have popcorn ceilings.
Step 1:
Gather your materials. You'll need a straight razor, scissors, tape measure, chalk line reel, straight edge, and the recommended construction adhesive. It bonds almost instantly with some pressure and it's repositionable for up to 15 minutes. You'll use a little less than 1/2 a tube of adhesive per panel.
Grab yourself a drop cloth to protect the floors and a wet rag to wipe off excess adhesive.
Step 2:
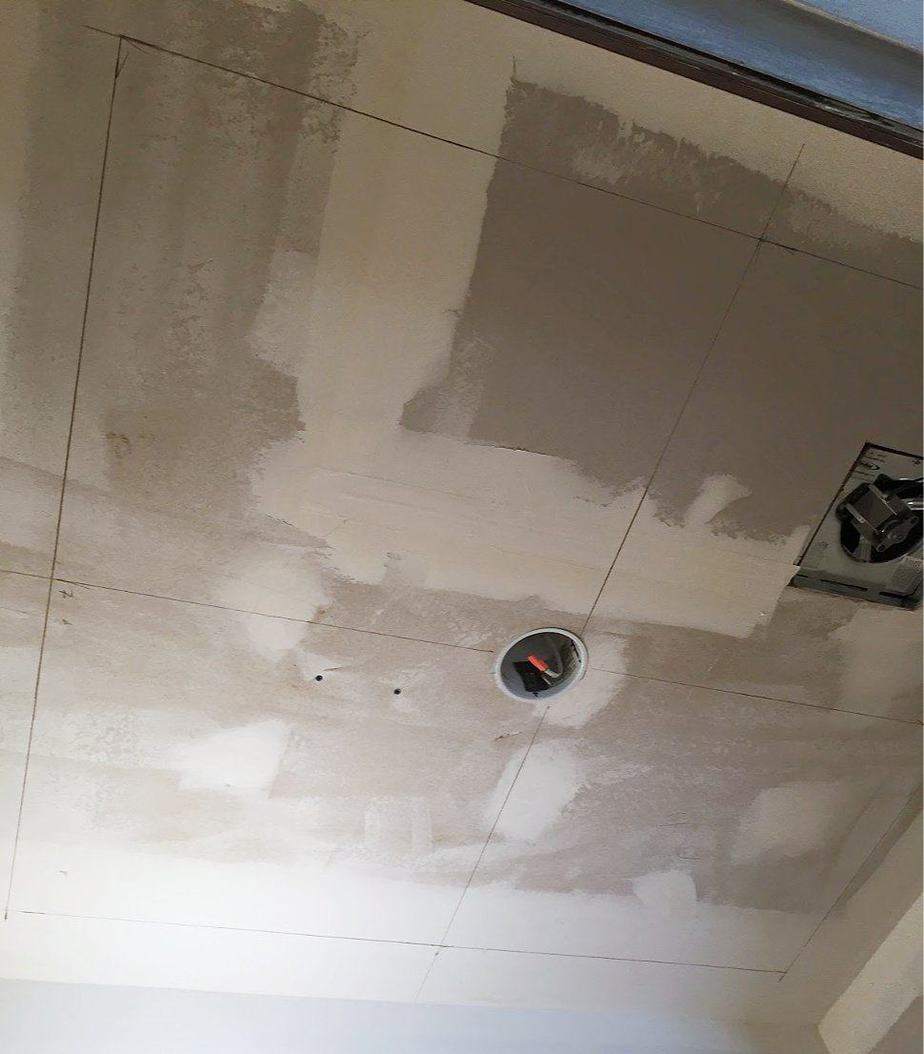
Find the center of your ceiling and mark it in both directions by either snapping a chalk line or marking it with a straight edge and pencil.
Step 3:
Apply the adhesive to the ceiling. Put enough for one or two panels at a time. You also have the option of applying the adhesive to the back of the panels first.

Step 4:
Attach your first panel at the center line and give it some firm pressure.
Step 5:
Place a very small bead of adhesive in the "dash" channel of your next ceiling tile then lock it into the other panel.
Step 6:
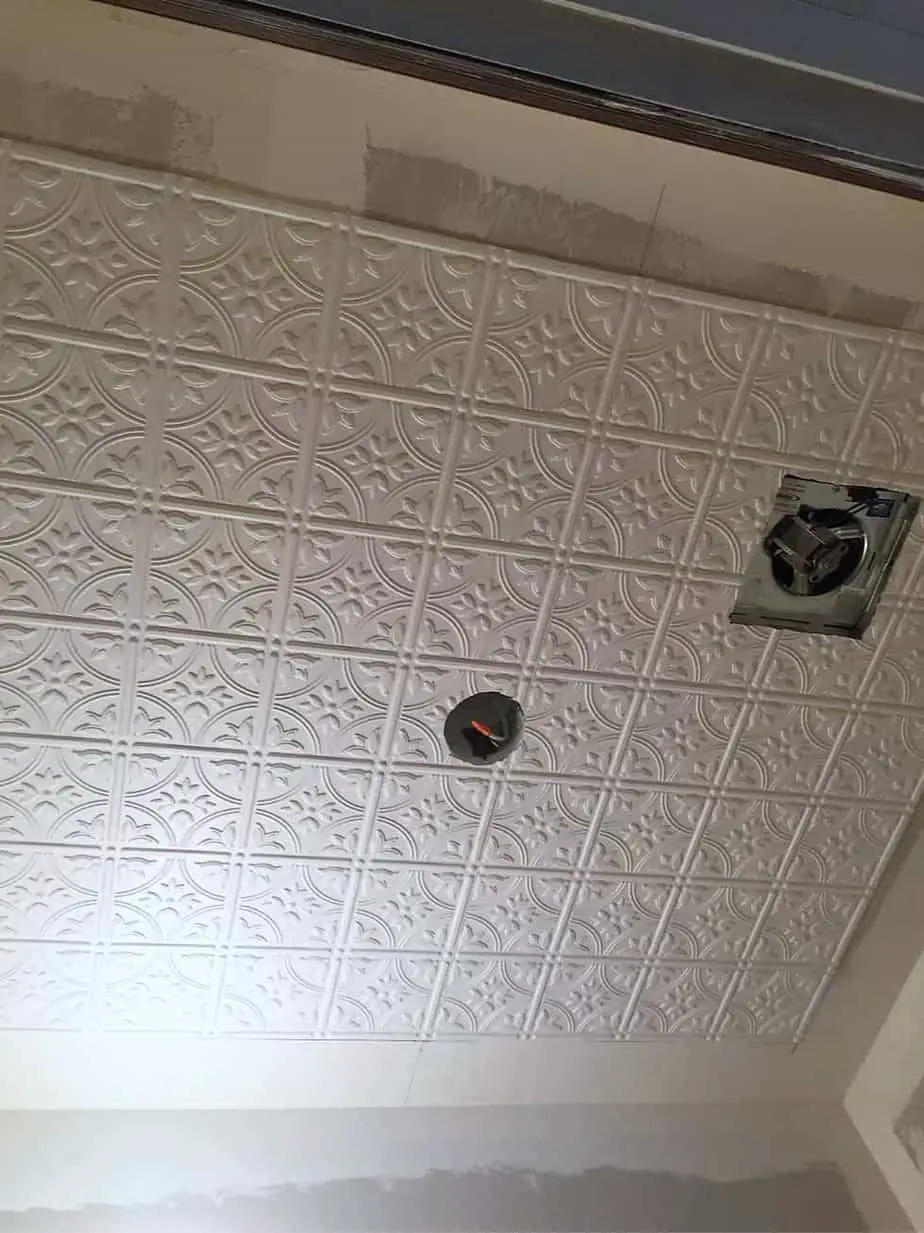
Once the glue has about 15 minutes to set up, you can cut around the ceiling box with a razor knife. The panels are thin enough to feel where you need to cut. Be sure to cut off the power first.
Step 7:
Now, all that's left to do are the finishing touches such as crown molding and trim around the panels. The 3/4" trim we applied around the outside edge of the panels was primed and painted before we nailed it in place.
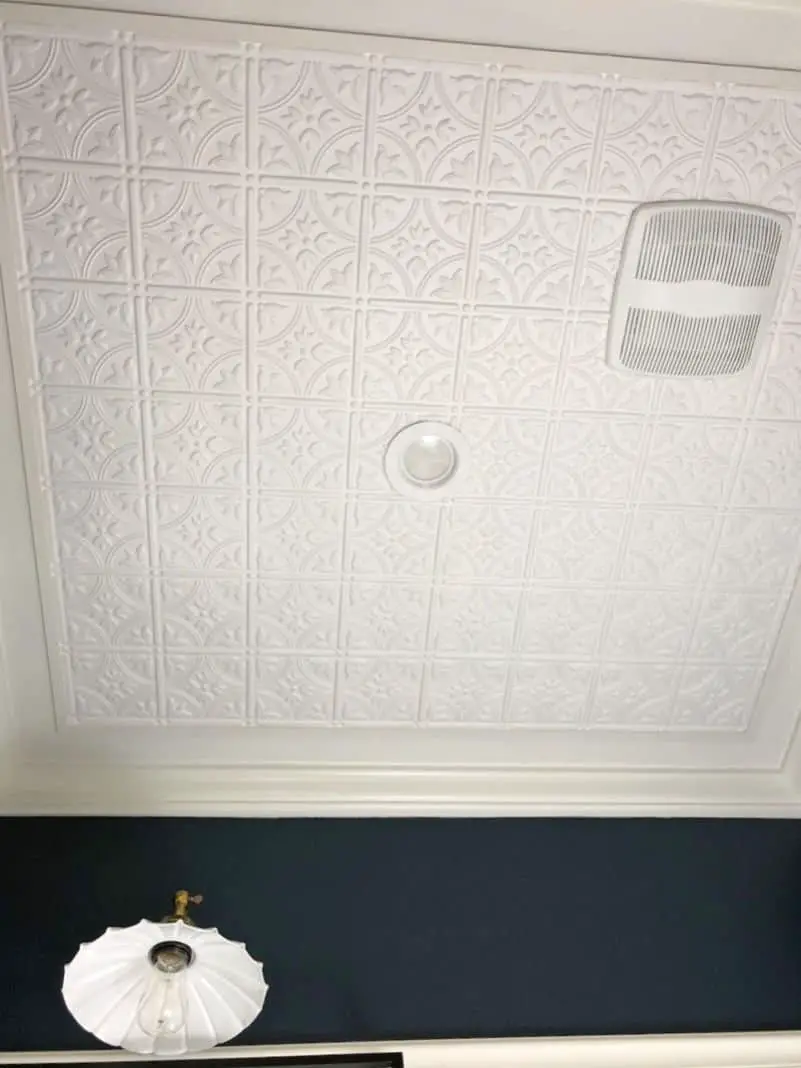
So, there you have it! After a few hours of work, we now have a ceiling that's far from being bland, don't you think?
Do you have a ceiling in your home that needs a creative touch such as faux tin ceiling tiles? Would you leave them white or paint them to look like metal? I'd love to hear your ideas.
If you'd like to see how we put up the beadboard, you can read about it in this post.
I'd love for you to check out the completed makeover in our half bath reveal! It's a blend of vintage with a touch of modern.
Happy DIY'ing,

how to install ceiling tiles
Source: https://www.simplicityinthesouth.com/how-to-install-faux-tin-ceiling-tiles-bathroom/
Posted by: skillernwidee1984.blogspot.com
0 Response to "how to install ceiling tiles"
Post a Comment